How to Collect Photos From Guests
2. Upload a Photo to Your Album
3. Share Your URL and QR Code With Guests
4. (Optional) Add a Personal Background Image
What Dimensions Work Best for the Background Image?
How to Enable the Public Gallery
How to Use the Moderator Tools
Removing a Photo From the Gallery
Reinstating a Photo Into the Gallery
This tutorial begins after you have signed-up and connected your Google DriveTM with WedUploader.
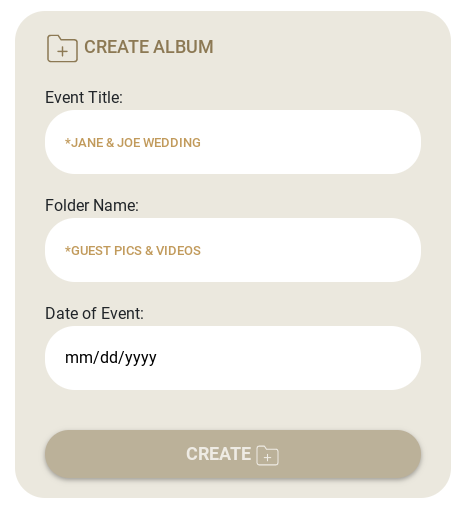
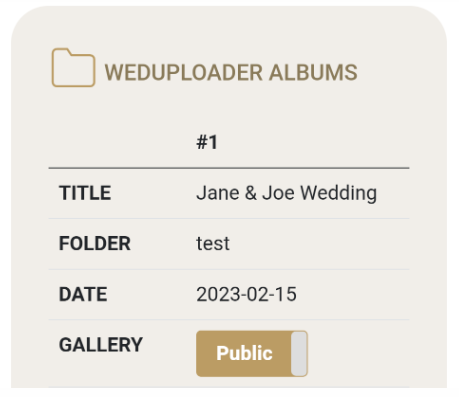
The first step will be to enter a title for your event which will help your guest identify your album.
Next, you’ll enter a name for the folder that will be created in your Google Drive where all guest uploads will be sent.
Lastly, select the date of your event and click CREATE.
Note: Your Google Drive folder is created when the first file is uploaded to your album.
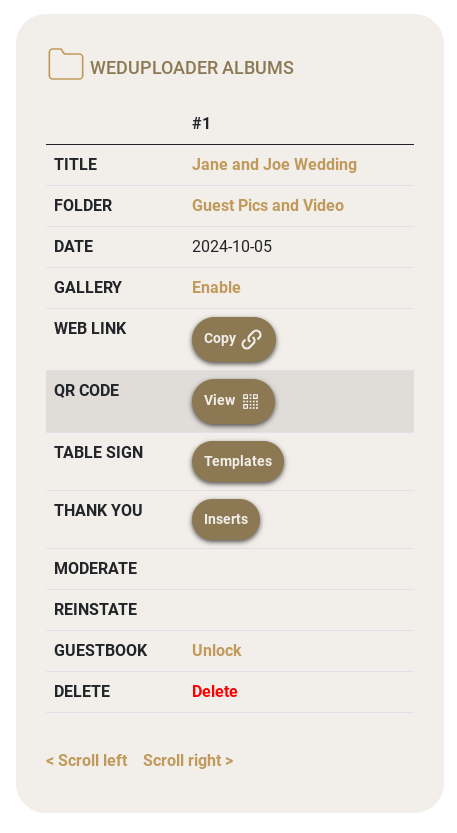
Once you’ve created your album, you’ll want to upload your first photo. Scroll to the WedUploader Album section and click on the album's title.
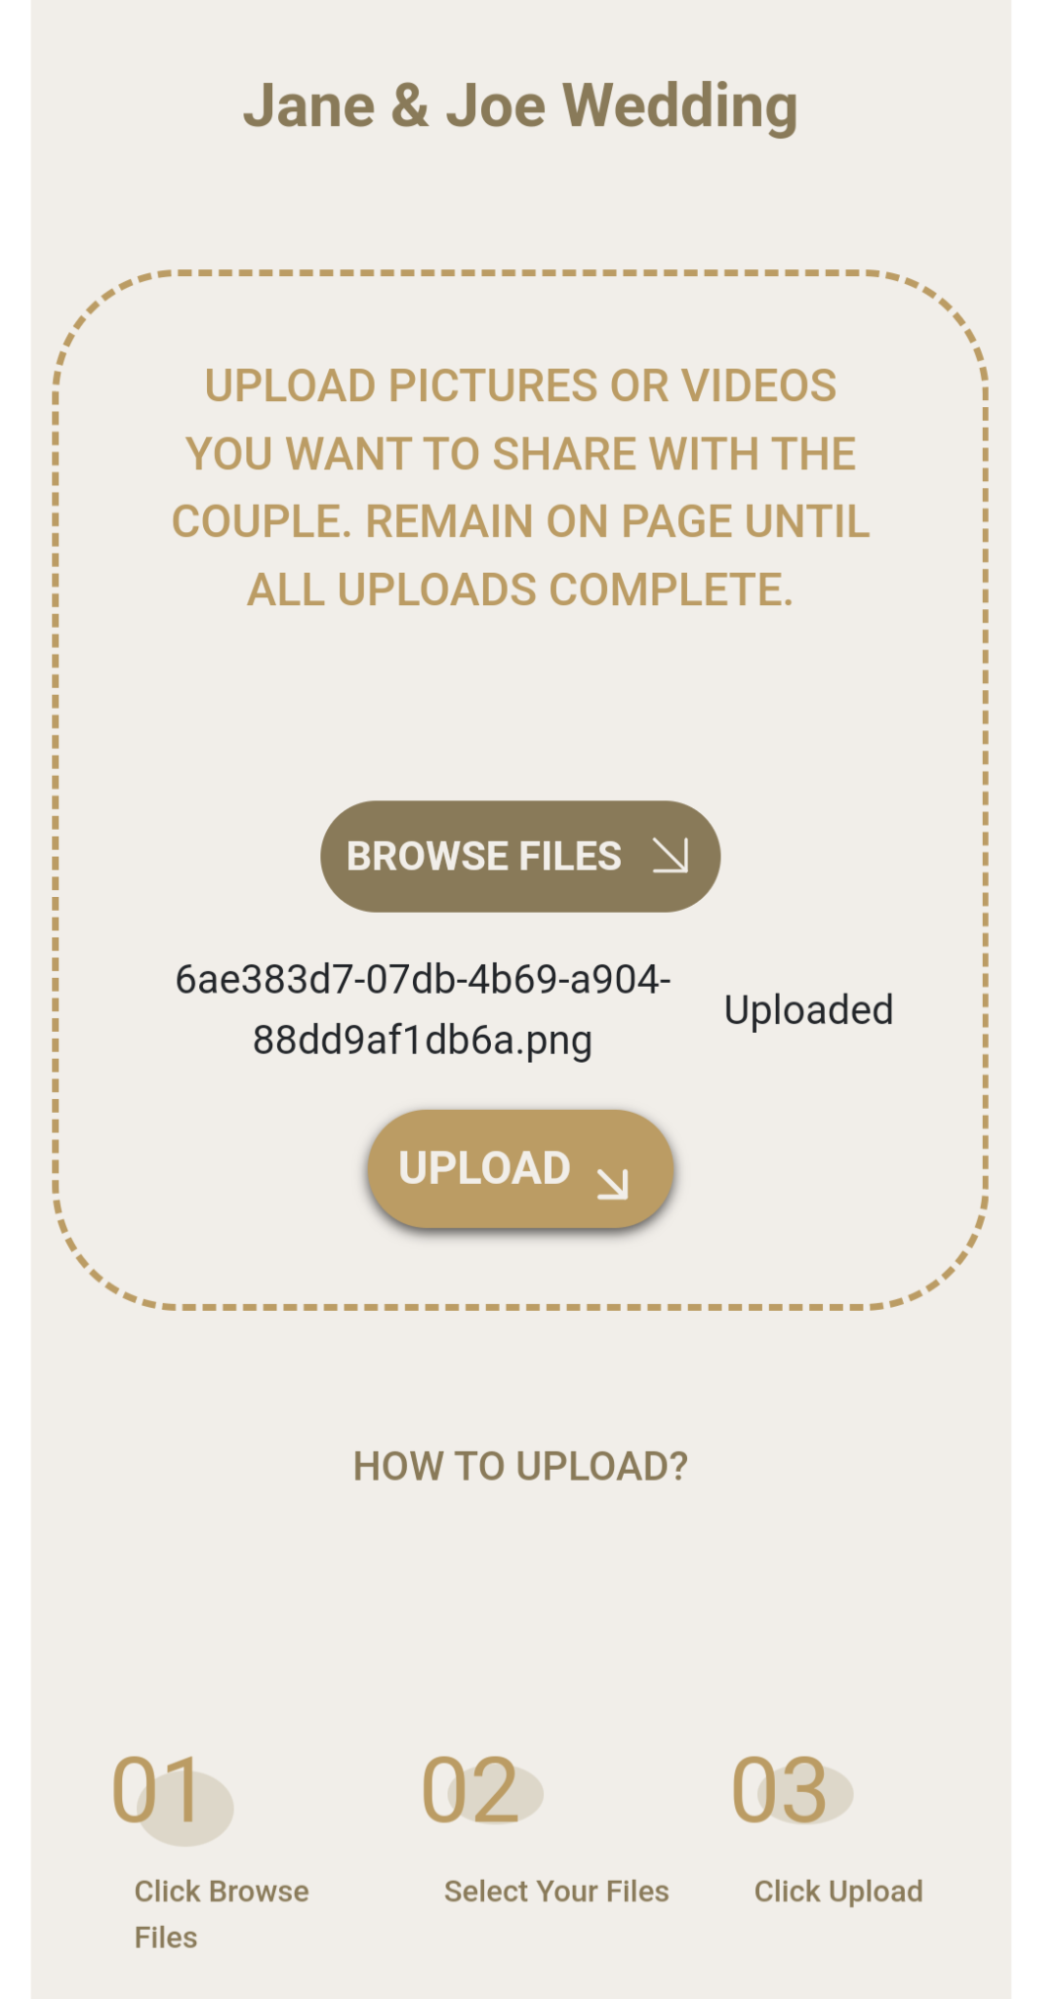
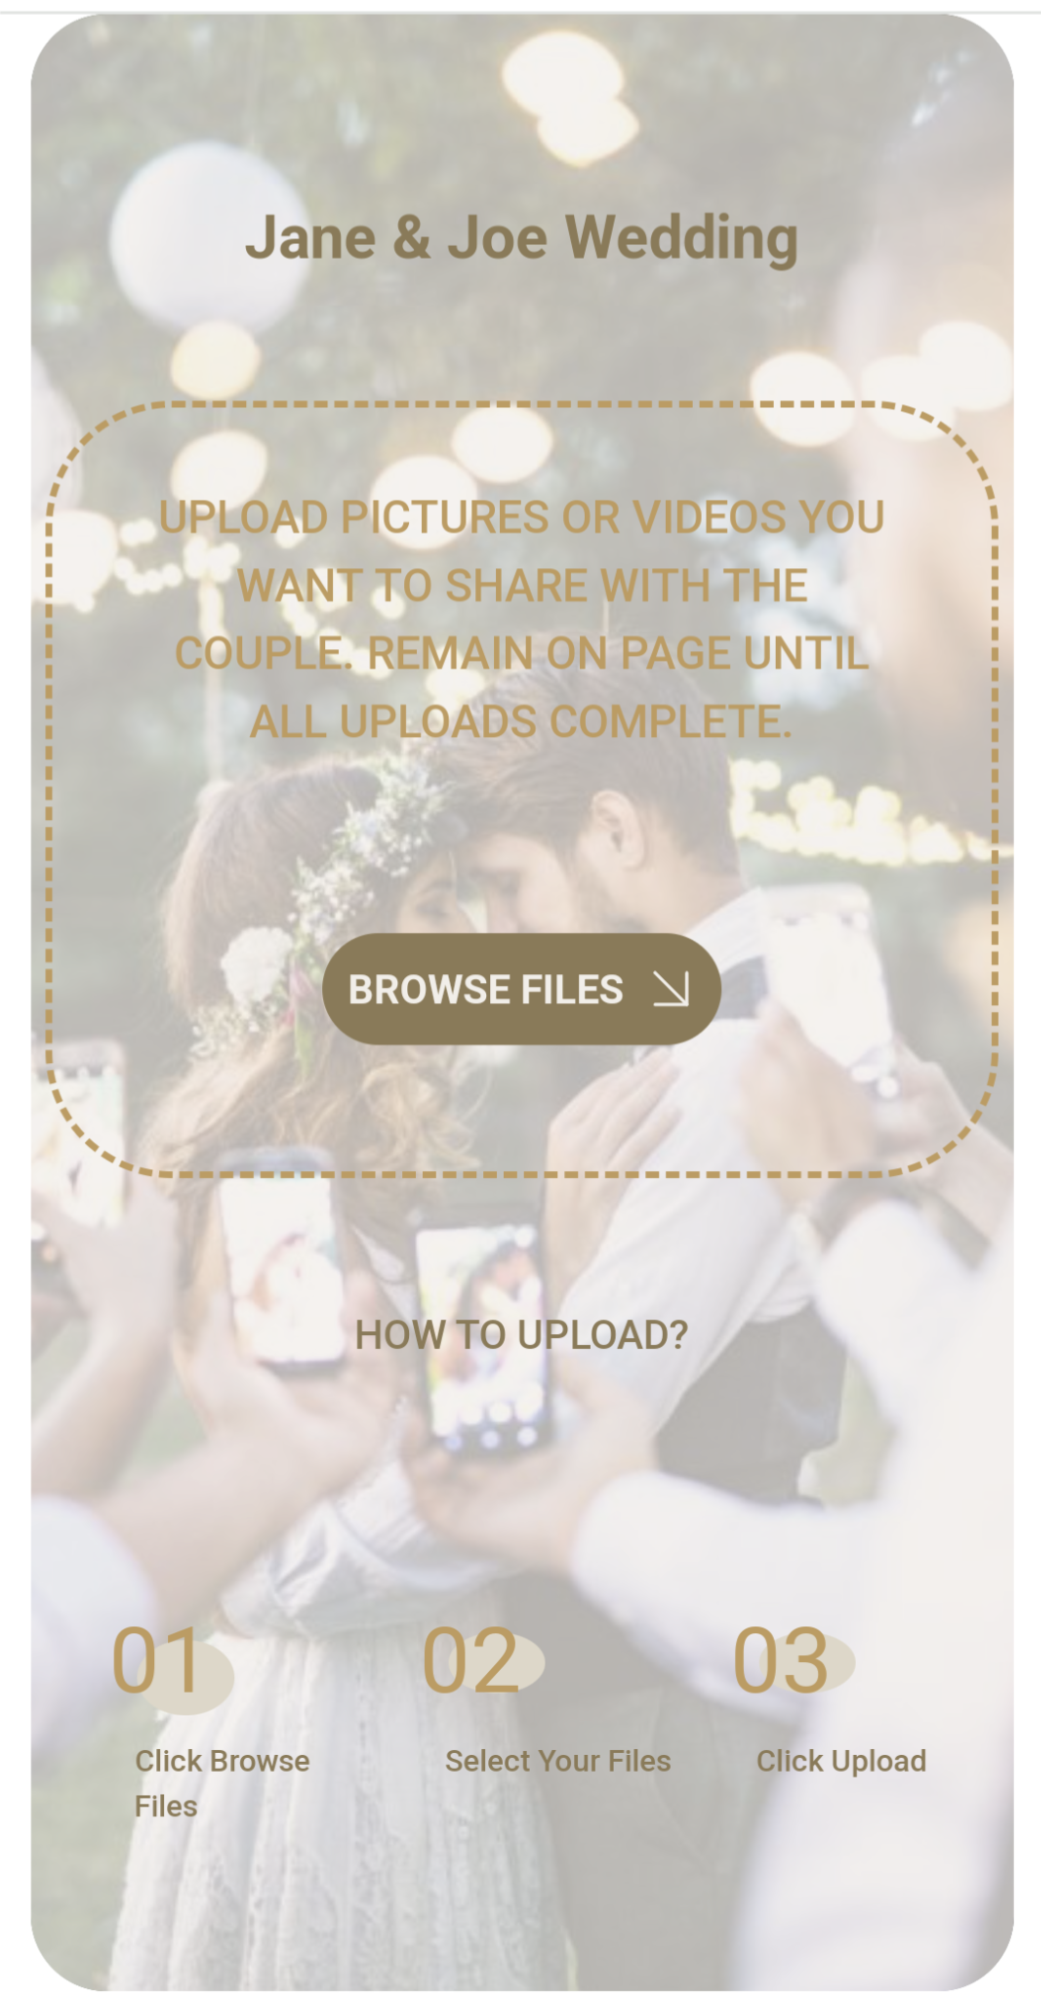
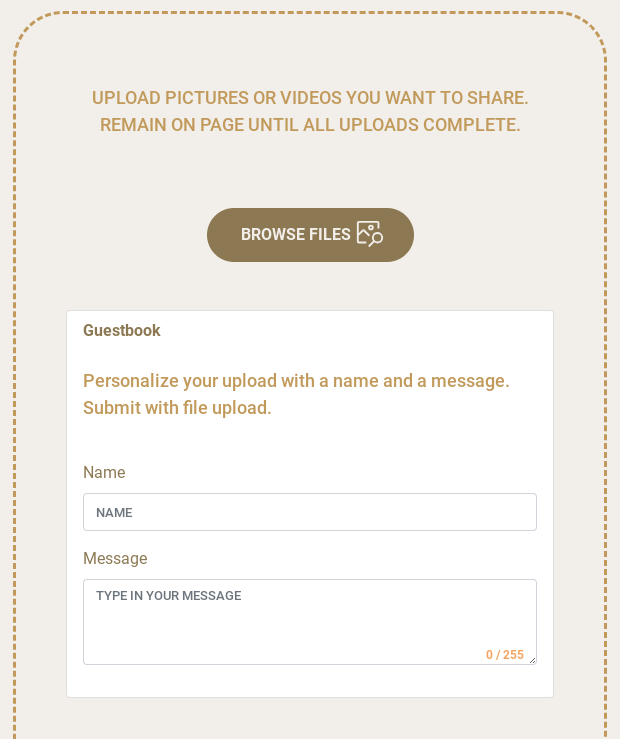
Now you are on your unique WedUploader album page. To upload your first photo, click BROWSE FILES, select a photo using your device’s file picker and confirm your choice, and then click UPLOAD.
You’ll see progress status for your upload and when it is complete, it’ll say “Uploaded” next to your file and you’ll receive an email notification.
Most importantly, your photo is now in your Google Drive in the folder you named when creating your album. Click here to navigate to your Google Drive.
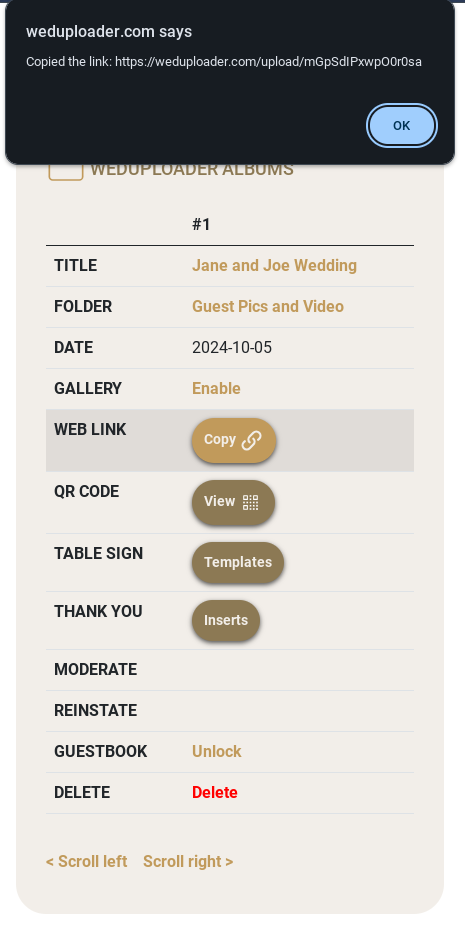
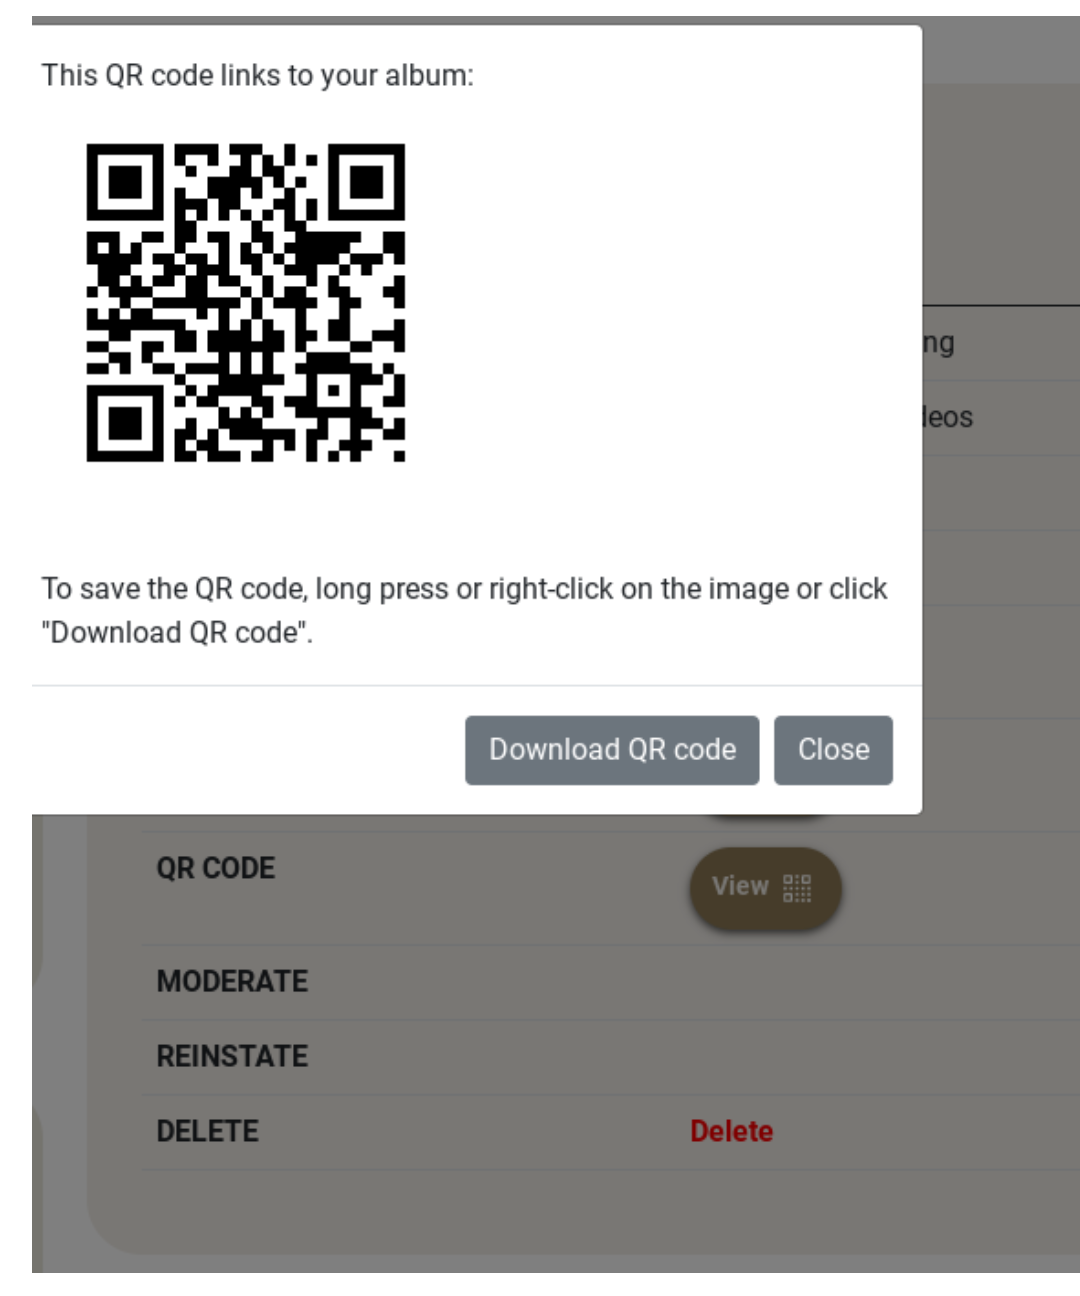
To share your album with guests so they can upload photos, you’ll need to grab (A) the unique URL or (B) the QR code.
Now once you have the link and QR code, you can share your album with your guests however you like. Popular ideas are to post the link on your wedding website, email the link to guests, and share the link through social media.
Many couples will also create table cards with the QR code as well as send out the QR code with thank you notes reminding guests they want all those photos! Here is a video one of our users created showing how they made QR code signs for their wedding… https://www.tiktok.com/
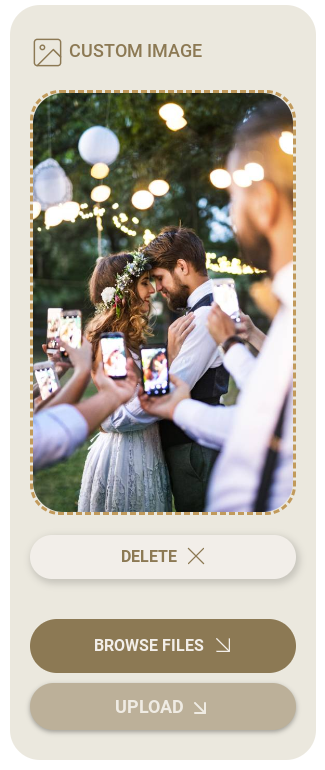
Now that you have your unique WedUploader album to share with guests, personalize it with a custom background image.
From your dashboard, scroll to the Custom Image section, click BROWSE FILES, select the image you want to use in the file picker and confirm, and click UPLOAD.
Note: The image you choose is used for the background of all your WedUploader albums.
The vast majority of your guests will be uploading from a mobile device so a portrait orientation (skinnier and taller photo) is best. Also, since the vast majority of your guests will be on mobile devices, the best dimensions for your background image, in our opinion, are ~500px in width and ~800px in height.
Feel free to experiment with different background images. You might find you have a landscape oriented (wider and shorter) photo that looks good on both desktop and mobile.
If you need assistance getting the background image just right, don’t hesitate to contact us and we’ll be happy to help!
A convenient way to share guest uploads with all your guests is to enable the public gallery for your WedUploader album.
See above for instructions if you have not created a WedUploader album.
From your dashboard, scroll to the WedUploader Albums section and click Enable.
Enter payment information in the Enable Gallery and Guestbook section and click Pay. You’ll be notified of successful payment and be presented with a button to return you to the dashboard.
By default, all albums are set to private. To make all uploads in a particular album appear in the gallery section of your WedUploader album page, click on Private in the WedUploader Album section of your dashboard. This will toggle the button from Private to Public as well as unlock the Moderate and Reinstate buttons.
Note: You can return an album to private status at any time by toggling the gallery from Public to Private.
Now if you navigate to your WedUploader album by clicking on the title, you’ll see all uploaded photos in the gallery section which is right below the upload section.
There are two moderator functions available - remove and reinstate. Obviously, removing a photo from the gallery will hide it from view and reinstating a photo will bring it back into view.
Note: Once uploaded, all files remain in your Google Drive folder and removing a file from the gallery does not delete it from your Google Drive. Removing and reinstating a photo only tags the photo as visible or hidden in your gallery. To delete a file permanently, you’ll have to do so from the Google Drive interface.
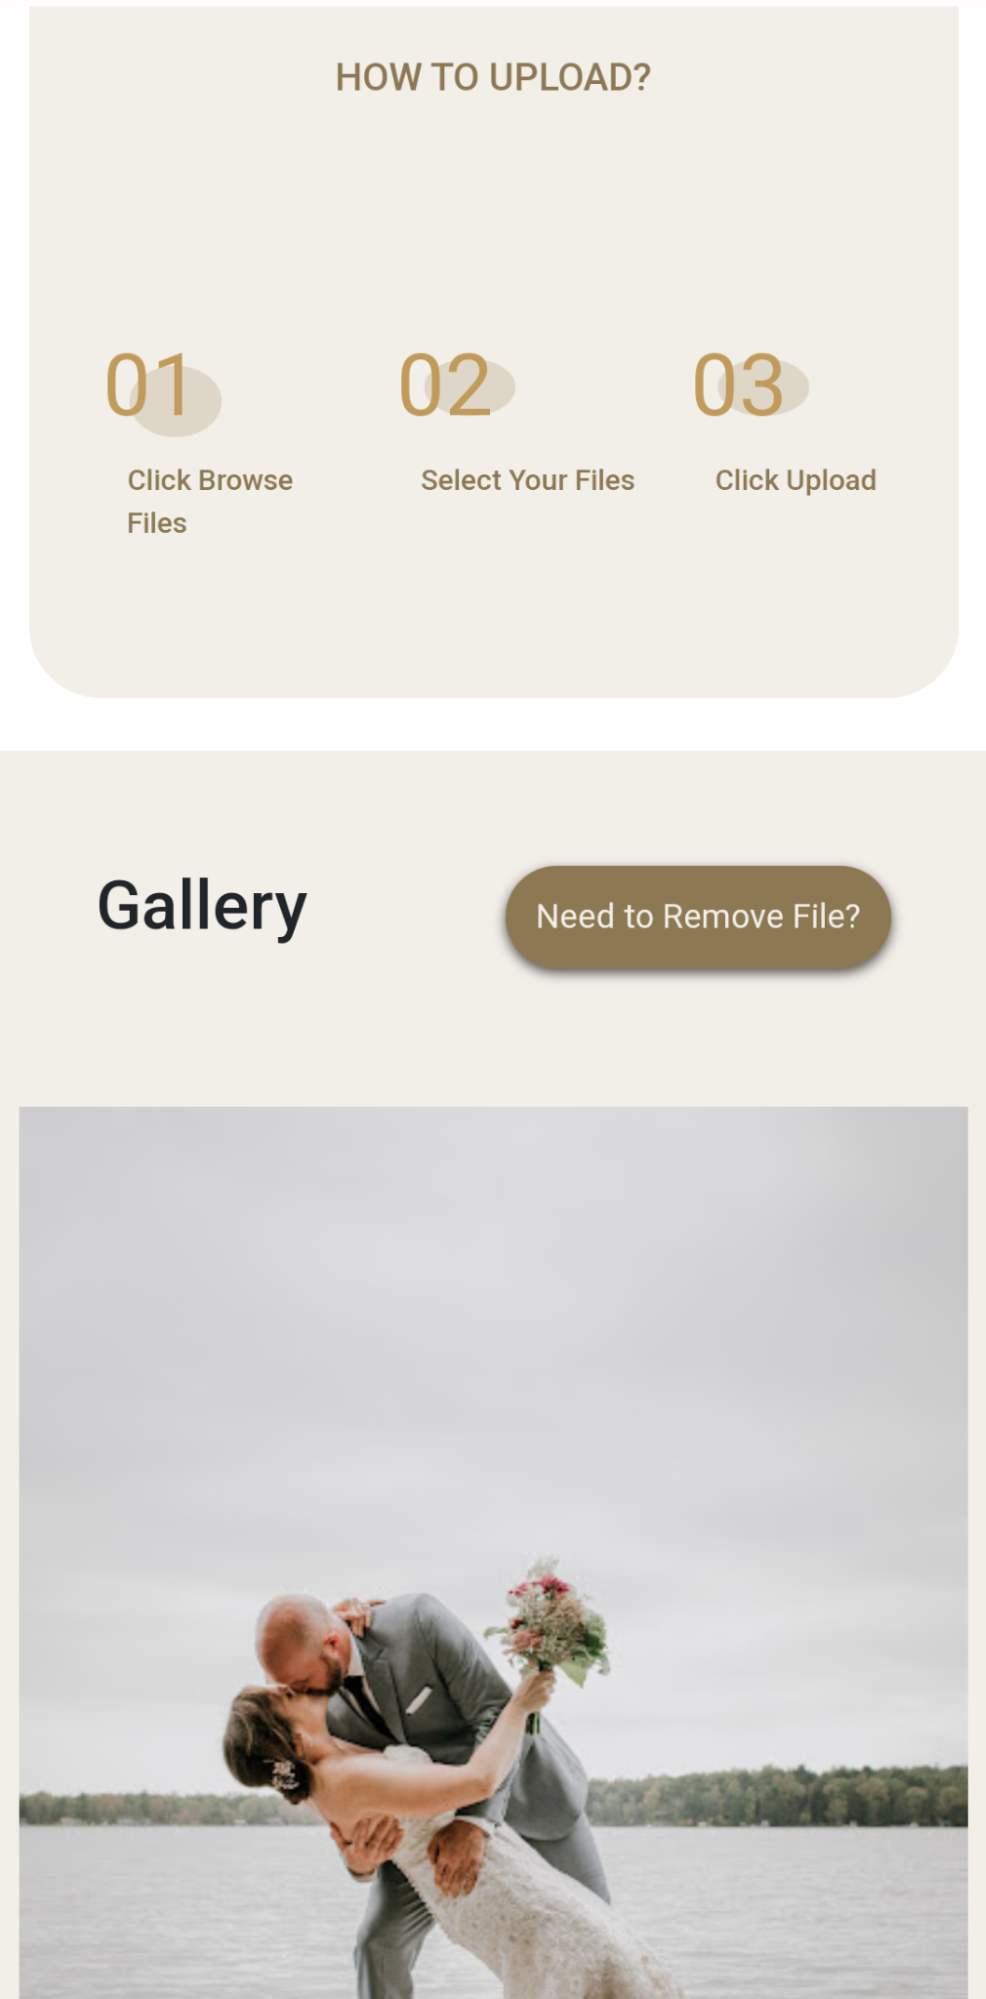
As the owner of the WedUploader album, you can click Moderator in the WedUploader Album section of the dashboard or as a guest, you can click the Need to Remove File button in the gallery section.
On the moderator page, you and any guest may remove photos from the gallery by clicking the red trash can icon.
Only you as the owner of the WedUploader album have available the Reinstate link in the WedUploader Album section of your dashboard. You can reinstate images that have been removed by navigating to the reinstate page and clicking the Reinstate button.
Note: The reinstate link is a public link just like your unique WedUploader album page and the moderator page. This is so you can designate a “moderator” at your wedding, if you so choose, who can monitor the photos in the gallery and remove and reinstate as necessary.
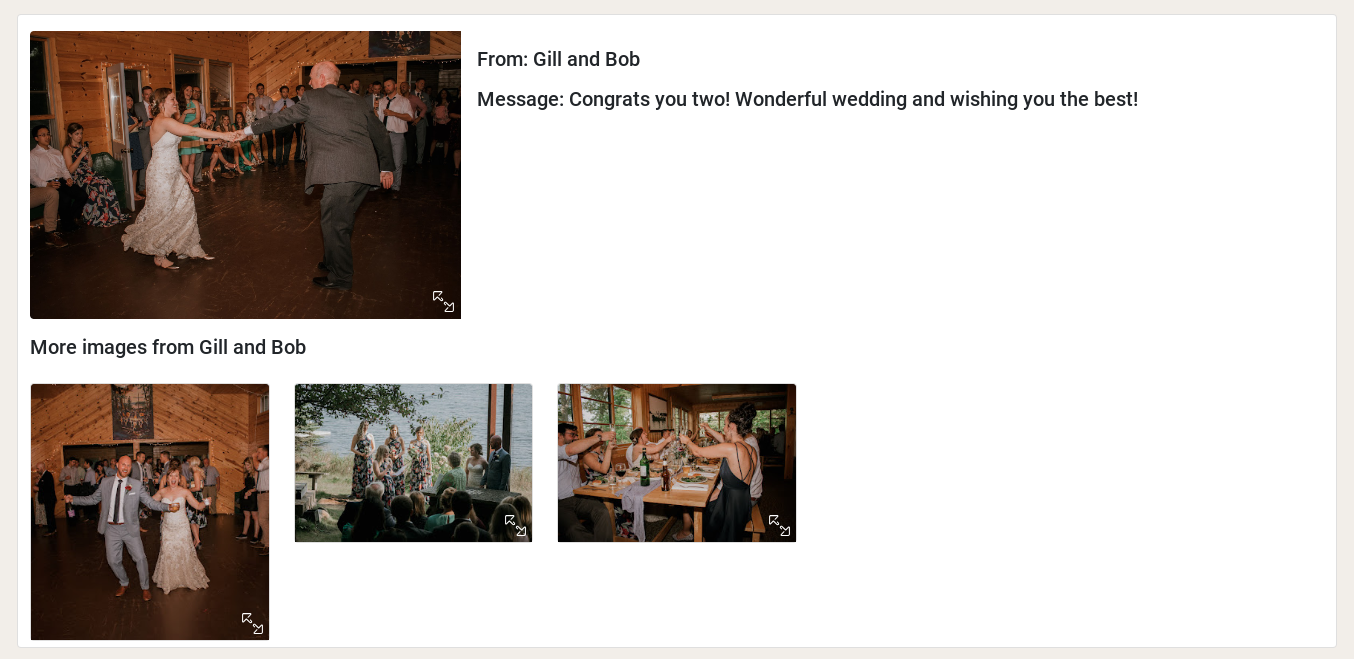
A wonderful way to enhance guest uploads with a personal message is to unlock the guestbook feature for your WedUploader album.
See above for instructions if you have not created a WedUploader album.
From your dashboard, scroll to the WedUploader Albums section and click Unlock.
Enter payment information in the Enable Gallery and Guestbook section and click Pay. You’ll be notified of successful payment and be presented with a button to return you to the dashboard.
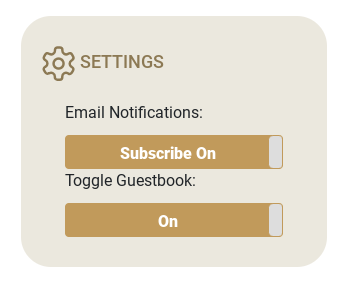
Check your Settings and confirm Toggle Guestbook is set to On. The guestbook feature will now be available for all you WedUploader albums.
Note: You can turn off the guestbook feature at anytime by toggling the setting to Off.
Now if you navigate to your album by clicking on the album title, you’ll see the option to enter a name and message with your upload.
Now if you navigate to your dashboard and click Guestbook, you’ll see all the guest upload batches with whom they are from and a message.
Note: The guestbook feature does not require logins or accounts for your guests. It is also designed to be optional so guests can upload photos and videos without having to enter their name or message.